How to Connect MySQL Database in AIWU
Introduction
AIWU allows you to connect to MySQL databases and execute SQL queries directly from your workflows. You can connect to your current WordPress database or any external MySQL database.
This integration enables powerful automation scenarios:
- Query customer data for personalized campaigns
- Sync data between WordPress and external systems
- Generate reports from database records
- Automate data cleanup and maintenance tasks
What you will learn:
- How to set up MySQL integration in AIWU
- How to connect to WordPress database or external MySQL server
- How to configure connection settings
Step-by-Step Guide
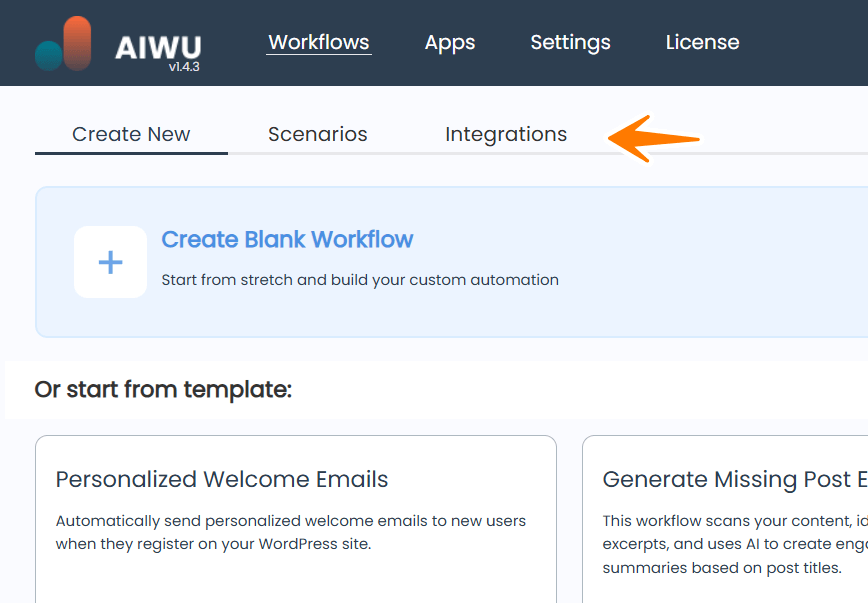
Step 1: Open Integrations Tab
- Go to AIWU – Workflows in your WordPress admin panel
- Click on the Integrations tab
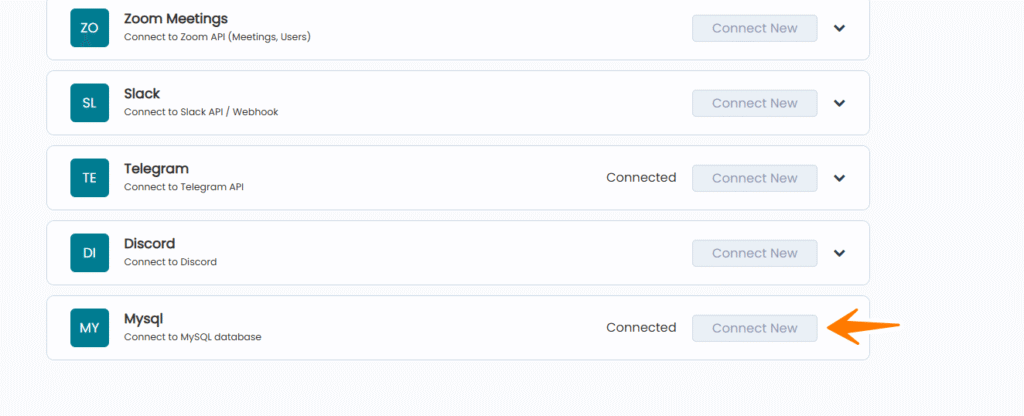
Step 2: Find MySQL Integration
- Scroll down to find Mysql in the integrations list
- Click Connect New button
Step 3: Configure Connection Settings
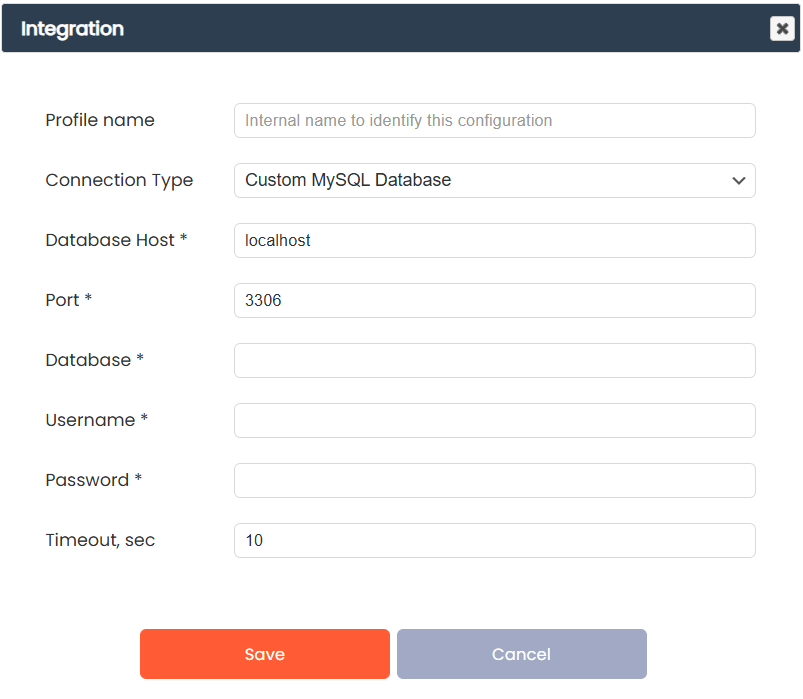
Profile Name
Internal name to identify this connection. Use a descriptive name like:
- Production DB
- CRM Database
- Analytics Server
Connection Type
Choose how to connect to the database:
WordPress Database (current) – Uses your existing WordPress database connection. No additional credentials needed.
Custom MySQL Database – Connect to any external MySQL server with custom credentials.
When to use WordPress Database:
- Query WordPress tables (users, posts, options)
- Work with WooCommerce data
- Access plugin data stored in WordPress DB
When to use Custom MySQL Database:
- Connect to external CRM or ERP systems
- Access legacy databases
- Query data from other applications
Custom MySQL Database Settings
If you selected Custom MySQL Database, fill in these fields:
Database Host – Server address. Example: localhost or db.example.com
Port – MySQL port, default is 3306
Database – Database name. Example: my_database
Username – MySQL user. Example: db_user
Password – MySQL password
Timeout, sec – Connection timeout. Default is 10
Step 4: Save and Test Connection
- Click Save to save the configuration
- The system will automatically test the connection
- If successful, you will see Connected status

Managing Connections
After saving, you can manage your MySQL connections:
Test – Verify the connection is working
Edit – Modify connection settings
Delete – Remove the connection
You can create multiple MySQL connections for different databases and select the appropriate one in your workflows.
Security Best Practices
Use dedicated database user
Create a MySQL user with only the permissions needed for your workflows. Grant only SELECT, INSERT, UPDATE, or DELETE as required.
Avoid root credentials
Never use root or admin database credentials in your integrations.
Limit network access
If using external database, ensure your server IP is whitelisted in the database firewall.
Use strong passwords
Generate complex passwords for database users.
Enable SSL
For remote connections, use SSL-encrypted connections when possible.
Troubleshooting
Connection Failed
Possible causes:
- Incorrect host, port, or credentials
- Database server is not accessible from your WordPress server
- Firewall blocking the connection
- MySQL user lacks permission to connect from your server IP
Solutions:
- Verify credentials are correct
- Check if database server allows remote connections
- Whitelist your WordPress server IP in database firewall
- Grant MySQL user access from your server IP
Timeout Errors
Solutions:
- Increase timeout value in connection settings
- Check network latency between servers
- Verify database server is not overloaded