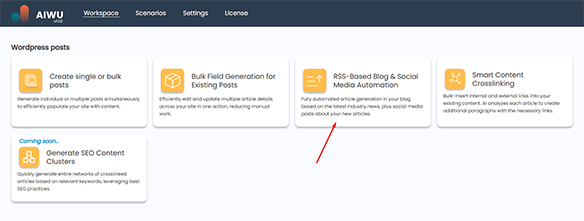
RSS-Based Blog & Social Media Automation
A fully automated system for generating articles based on an RSS feed and automatically posting social media updates about the created articles. This provides users with a completely automated content creation and social media marketing solution.
Setting Up the RSS Feed on the User’s Side
The user configures their RSS feed using a chosen service (e.g., RSS.com, Feedly, etc.). This typically involves entering keywords to generate a stream of news relevant to their interests. The service then generates a unique URL containing continuously updated content that aligns with the specified topics.
Setting Up Your RSS
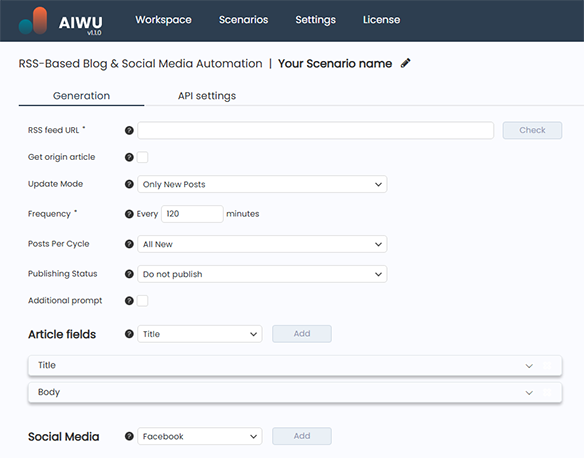
Adding a Link
Enter the URL of your RSS feed and click the “Check” button to validate its content.
Update Mode
Select which posts to process:
- Only New Posts – The system processes only entries that appear after activation.
- All Posts – The system processes all existing content in the RSS feed and continues updating with new posts.
- One-Time – The system processes only the current posts and then disables automatic updates.
Update Frequency
Set how often the system should check the RSS feed for new posts. This determines the frequency at which new blog articles are generated.
Enter the time (in minutes) for how frequently the system should scan the RSS feed for updates.
Posts Per Update Cycle
Choose how many new posts should be processed per update cycle. You can limit processing to just the latest post or include all newly found posts.
This feature is available only if the update mode includes new posts and applies exclusively to newly added content. You can specify:
- All New – Processes all newly found posts.
- All New, Up to “number” – Processes new posts but limits them to the specified number.
- Exact Number: “number” – Processes only the exact number of posts you specify (e.g., setting it to 1 means the system will process only the latest post).
Publishing Status
Choose whether to automatically publish articles or save them as drafts for review.
Available options:
- Generate Draft and Send for Approval
- Publish Without Approval
If approval is required, the administrator will receive a notification via email and the admin panel. The notification includes a link to the history section, where the admin can review, edit, publish, or delete the article.
Additional Prompt for the Article
Provide extra details or context to guide AI-generated content for the entire article. This prompt applies to all selected fields. If you need a specific prompt for a particular field, you can set it in the Article Fields section under the respective field.
Article fields
In this section, you can select which fields to generate and their settings.
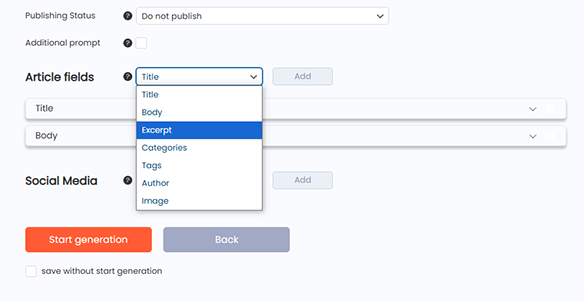
1. Title
The title field is required and plays a key role in your article. You have the option to customize it in the following ways:
- Mode: This option defines the way the article title will be created.
- Generate based article: Generates the article title based on the article text.
- Rephrase the original title: Creates the article title based on the original title.
- Additional Prompt for Title: Include any additional context or specific guidelines for generating the article title. This input will help fine-tune the title to better align with your requirements or preferences.
2. Body
The body field is required and holds the main content of your article. You can modify this field using the following options:
- Mode: Choose how the body of the article will be generated:
- Single-prompt Article: Generates the entire body of the article in one step with a single API request based on the title.
- Source link: This option allows you to choose whether to add a link to the source in the text of the article.
- Additional Prompt for Body: Include additional context or specific instructions to enhance the article body generation. This prompt will help tailor the content to better meet your requirements or preferences.
3. Excerpt
Excerpt offers a short summary of your article. You can modify this field in the following ways:
- Maximum Characters: Define the maximum character count for the excerpt. This restriction ensures the summary remains within the preferred length for your article.
- Additional Prompt for Excerpts: Add any additional context or specific instructions to fine-tune the excerpt generation. This will help tailor the excerpt to better align with your requirements or preferences.
4. Categories
Categories help structure and organize your article within your site. You can modify this field in the following ways:
- Mode: Choose how categories will be assigned:
- Fixed value: Select existing categories.
- Generate based on Article: Creates a set number of categories derived from the article content.
- Select categories: Select existing categories to add.
5. Tags
Tags help categorize content with relevant keywords, improving searchability. You can modify this field in the following ways:
- Mode: Choose how tags for the article will be assigned:
- Fixed value: Select existing tags.
- Generate based on Article: Creates a defined number of tags derived from the article content.
- Additional Prompt for Tags: Provide any extra context or instructions to refine the generation of tags.
6. Author
Allows you to add the selected Content Author.
- Select user: Select the Author from the list of site authors, he will be set as the author of the article.
7. Image
Images improve the visual presentation of your article. You can adjust this field using the following options:
- Mode: Select the method for generating images for the article.
- Preset:Choose a preset style or configuration for image generation to maintain consistency with your article’s theme.
- Orientation: Select the image orientation: square, landscape (horizontal), or portrait (vertical). Note: The DALL-E-2 model does not support orientation options for articles.
- Additional Prompt for Images: Give detailed guidelines to enhance the image generation process.
- Generate Alt text: If the checkbox is active, an Alt description will also be generated and added for the image.
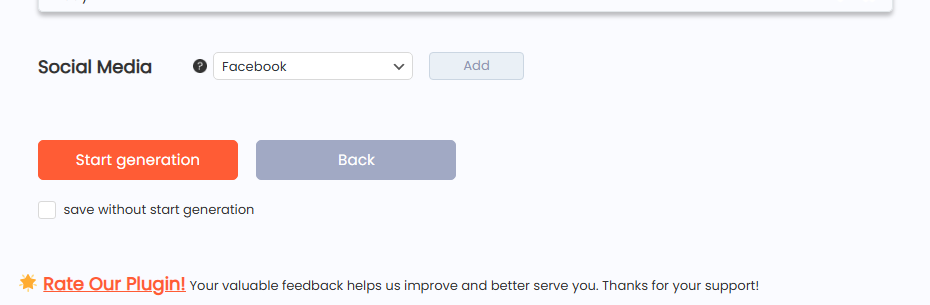
8. Social Media
This functionality allows you to connect social networks in which posts about new articles will be automatically added.
Select the desired social network and click Add, it will be added as a separate tab with the ability to customize.
- Mode:This setting determines how the article body will be generated.
- Generate based article: Creates the article body based on the content of the article.
- Additional Prompt: Provide extra context or specific instructions for generating the article. This will help refine the text to better match your needs and preferences.
Buttons:
Start generation – starts the generation process according to the settings specified in the scenario.
Back – returns to workspace.
History and auto-publishing control.
When you create a script, it appears in the History tab along with other features. Clicking on an operation takes us to the dashboard, where we can manage the publications within that script.
In this section you will find:
1. Set up a Scenario.
When you click this button, you will be returned to the script setup. This action cancels all ongoing processes but preserves already published and pending approval publications.
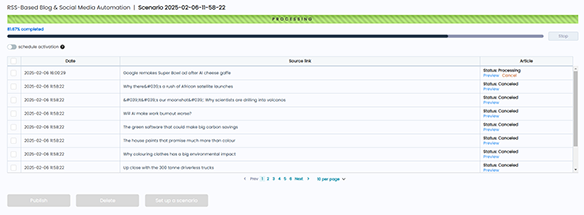
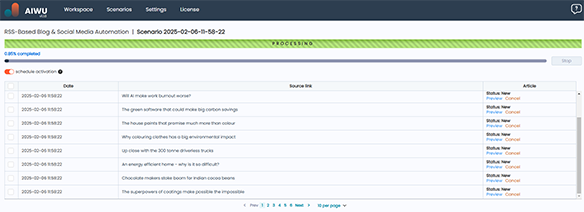
2. Log
This is a table containing data on all publications (including articles and social media posts), divided into the following columns:
- Date: Operation date.
- Source Link: Link to the original news.
- Article: Article status (Generated/Published/Removed) and available actions.
- Social Media Posts: Status for each social media post (Generated/Published) and available actions.
- Actions: Bulk management options (Publish all, Delete all) available only for the Generated status.
3. Actions by Statuses
For Articles and Social Media Posts with “Generated” Status:
- Preview: Opens the editor for content modifications.
- Publish: Publishes the selected article or post.
- Delete: Permanently removes the publication without the possibility of recovery.
- Publish all: Publishes all related publications (articles and social media posts).
- Delete all: Deletes all publications, including articles and social media posts.
For Articles with “Published” Status:
- Edit: Opens the editor for making changes.
- View: Provides a link to the published article on the website’s front end.
- Delete: Completely removes the article without the possibility of recovery.
For Social Media Posts with “Published” Status:
- View: Provides a link to the published post on the social media platform.
For Deleted Publications:
- If an article is deleted, a message appears: “The article was removed.”
- If social media posts were deleted or never scheduled, a message appears: “Social media posts were not included or were removed.”
- If the “Delete all” action was performed, the entire row is removed from history.
Content Generation Preview
Before initiating the generation process, make sure all settings in the API Settings are properly configured. This ensures that the generated content meets your preferences and requirements.
When you’re ready, click “Start Generation” to begin creating your article. If any adjustments are needed, select “Cancel” to return to the previous screen.
After clicking “Start Generation,” a preview of the generation process will be displayed.
Halting and Adjusting the Generation Process
If you notice that something isn’t going as expected or realize you need to make adjustments, you can stop the generation at any time by clicking the “Stop” button. Once stopped, you can click “Back” to return to the previous settings screen.
IMPORTANT: Clicking “Back” will erase any content already generated for this session. When all settings are correctly adjusted, simply press “Start” again to resume the generation process.
If you have chosen to generate the article body by sections and enabled the option to pause after creating section headers, the process will automatically stop once the headers are generated, allowing you to review them. Click “Preview” for each article to check the headings. If changes are needed, make the necessary edits and press “Start” to continue.
Regenerating Content
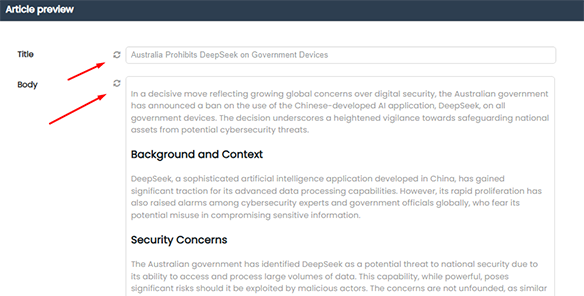
If you need to regenerate one or more fields within an article, first stop the generation process. Then, click “Preview” on the desired article, select the regeneration icon next to the field you want to modify, and press “Start” to regenerate only that specific field.
Editing Fields
If you did not choose to publish the article immediately, you can manually edit its content at this stage. Click “Preview,” select any field, and make the necessary edits. Once you are satisfied with the content, press “Publish” to make your article live.